Creating personalized nail art is a fun, creative, and affordable way to express your unique style. With the right techniques and tools, you can transform your nails into miniature canvases that reflect your personality. This Nail Art DIY Guide is designed to provide step-by-step instructions, creative inspiration, and expert tips to help you achieve professional-looking designs at home.
Index
Why Choose a DIY Approach to Nail Art?
DIY nail art empowers you to explore endless design possibilities without the expense of salon visits. It allows for complete creative freedom, enabling you to experiment with colors, textures, and patterns that perfectly match your mood and style.
- Cost-Effective: Save money by creating stunning nail art at home.
- Personalized Designs: Tailor each design to your taste, whether you prefer minimalist patterns or bold, intricate artwork.
- Therapeutic Process: Enjoy the relaxing and creative process of designing your own nails.
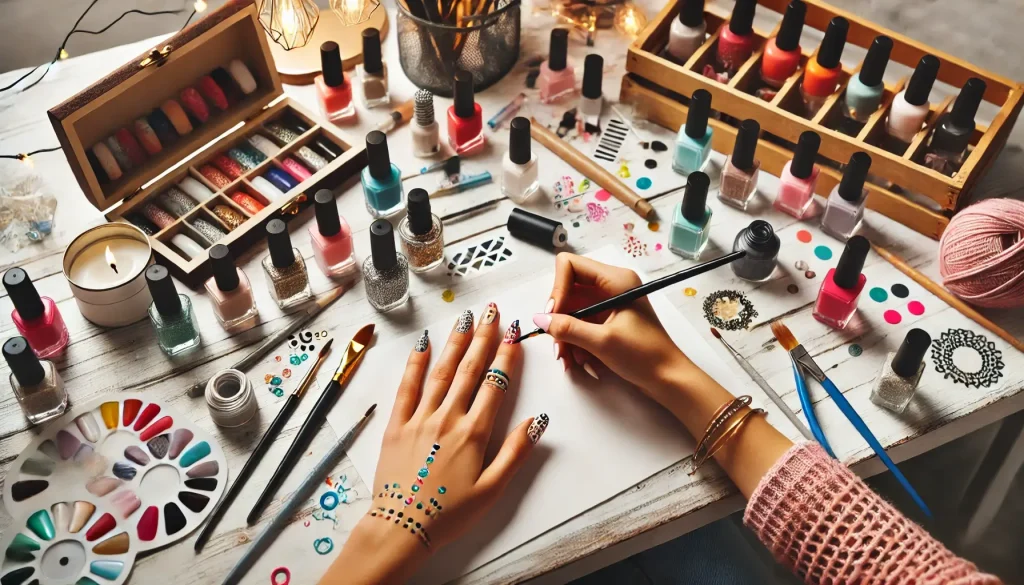
Essential Tools for Your Nail Art DIY Guide
Before you begin, it’s important to gather the right tools and supplies. Having a well-equipped nail kit is the foundation of any successful DIY project.
- Nail Brushes and Dotting Tools: Fine brushes and dotting tools are essential for creating precise details and patterns.
- Striping Tape and Stencils: Use these for clean, sharp lines and geometric shapes.
- High-Quality Nail Polishes: Invest in a range of colors and finishes, including matte, glossy, metallic, and glitter options.
- Base and Top Coats: A good base coat protects your nails from staining, while a durable top coat seals your design and adds lasting shine.
- Nail Files and Buffers: Ensure your nails are smooth and properly shaped before you start decorating.
- Cuticle Oil: Keep your cuticles nourished and hydrated for a neat appearance.
Step-by-Step Nail Art DIY Guide
Follow this comprehensive guide to create your own nail art designs that showcase your creativity and unique style.
Step 1: Nail Preparation
Proper preparation is key to achieving a long-lasting and flawless design.
- Clean and Shape Your Nails: Remove any old polish, trim, and file your nails into your desired shape. A smooth surface makes for easier application.
- Apply a Base Coat: Use a protective base coat to prevent staining and create a smooth canvas. Allow it to dry completely.
- Hydrate Your Cuticles: Apply cuticle oil to moisturize and soften your cuticles, making them easier to manage.
Step 2: Choose Your Base Color
Select a base color that will complement your design. Whether you opt for a neutral shade or a bold hue, make sure to apply two thin coats for even coverage.
- Tip: Lighter base colors work well with bright accent designs, while darker bases can make metallic or glitter details pop.
Step 3: Design Your Art
Now the fun part begins—creating your design! Here are a few techniques to try:
1. Dotting and Freehand Painting
- Dotting Tools: Use a dotting tool to create small dots, patterns, or even simple shapes like hearts or stars. Vary the size by adjusting pressure.
- Freehand Painting: With a fine brush, sketch out delicate lines, swirls, or intricate motifs. Start with light strokes and build up your design gradually.
2. Stripes and Geometric Patterns
- Striping Tape: Place striping tape on your nails to form clean lines or geometric shapes such as triangles and chevrons.
- Remove Tape Carefully: Once the polish in the taped areas dries, peel off the tape to reveal crisp, professional-looking lines.
3. Negative Space Art
- Leave Some Nails Bare: Use the natural nail as part of your design. By leaving sections unpolished, you create contrast and a modern aesthetic.
- Frame Your Design: Use a contrasting color to highlight and outline the negative space, enhancing the overall effect.
4. Combining Techniques
- Layer Your Designs: Mix and match different techniques on one nail. For example, create a striped background and overlay with freehand floral designs or dots.
- Experiment with Textures: Incorporate glitter, metallics, or even 3D elements like rhinestones to add depth and interest.
Step 4: Seal and Protect
After you’re satisfied with your design, finish with a high-quality top coat to seal in your artwork. This step not only enhances the shine but also protects your design from chipping and fading.
- Cure Properly: Allow ample time for the top coat to dry completely before engaging in any activities that might smudge your design.
Advanced Nail Art Techniques for the DIY Enthusiast
Once you’re comfortable with basic techniques, consider exploring these advanced methods to further elevate your nail art skills.
Water Marbling
- Technique: Drop various polish colors into a shallow dish of water, then use a toothpick to swirl them into a marbled pattern. Dip your nail into the design and carefully lift it out.
- Result: Each nail will have a unique, abstract pattern that adds an artistic flair.
3D Nail Art
- Tools: Use textured gels, rhinestones, or small decals to create raised designs.
- Application: Apply a layer of gel polish, place your embellishments, and then cure under a UV lamp. Seal with a top coat to lock in the 3D elements.
Stenciling
- How-To: Secure a stencil over your nail and apply polish with a sponge or brush. Remove the stencil carefully to reveal intricate patterns.
- Benefits: Stenciling is an excellent way to achieve complex designs with precision and minimal effort.
Tips for Perfecting Your Nail Art DIY Guide
- Practice Makes Perfect: Start with simpler designs and gradually work up to more intricate patterns. Practice on a nail art practice sheet if available.
- Stay Organized: Keep your tools clean and well-organized. This helps prevent accidental mixing of colors and ensures each tool performs at its best.
- Learn from Others: Follow nail art tutorials on social media platforms and engage with online communities for new ideas and inspiration.
- Experiment Boldly: Don’t be afraid to try new techniques or color combinations. Nail art is all about expressing your unique style, so let your creativity shine.
Inspiration to Spark Your Creativity
- Seasonal Themes: Adjust your nail art based on the season—pastels and florals for spring, vibrant hues and geometric patterns for summer, rich metallics for fall, and frosty designs for winter.
- Event-Specific Designs: Create nail art that celebrates holidays, festivals, or personal milestones. Customized designs add a personal touch to your look.
- Mix and Match: Combine multiple techniques on one nail for a dynamic, eye-catching effect. The contrast between different styles can make your nail art stand out.
Troubleshooting Common Challenges
Even seasoned nail artists encounter challenges. Here are solutions for common issues:
- Smudging: Ensure each layer dries completely before adding the next. Use a quick-dry top coat if needed.
- Uneven Lines: Practice steady hand movements on paper before applying to your nails, and consider using guides or stencils.
- Tool Mishaps: Regularly clean your brushes and dotting tools to maintain precision. Replace worn-out tools to avoid frustration and uneven application.
Embracing Your Unique Style
Your nail art should be a reflection of your personality. Whether you lean toward minimalist designs or bold, intricate patterns, the beauty of a Nail Art DIY Guide lies in its versatility and personalization. Every design is an opportunity to showcase your creativity and make a statement about who you are.
Conclusion
Mastering a Nail Art DIY Guide is an empowering journey that combines creativity with practical skill. With the right tools, techniques, and a willingness to experiment, you can create stunning nail art designs that are as unique as you are. From basic dotting and freehand painting to advanced water marbling and 3D embellishments, the possibilities are endless.
Explore new trends, embrace your creativity, and express your unique style with every nail. For more expert tips, detailed tutorials, and inspiring ideas to elevate your nail art game, visit our website at eu.artereciclada.com.br.
