
Nail art is an exciting blend of creativity and precision, and mastering Nail Art Techniques can transform your manicure into a stunning work of art. This guide is designed to take you through detailed methods—from basic skills to advanced practices—that will help you achieve intricate and professional-looking designs at home. Whether you’re a beginner or a seasoned nail artist, these techniques will empower you to add depth and flair to every set of nails.
Index
Fundamentals of Nail Art Techniques
Before diving into complex designs, it’s crucial to establish a strong foundation with essential nail art practices. Proper nail preparation, the right tools, and a steady hand are all key components of successful Nail Art Techniques.
Nail Preparation
- Clean and Shape: Start with clean, well-shaped nails by removing any old polish and filing to your preferred shape. A smooth nail surface ensures that your design adheres properly.
- Base Coat: Apply a quality base coat to protect your natural nails and prevent staining. A smooth base is the canvas upon which intricate details will stand out.
- Cuticle Care: Gently push back cuticles and moisturize the nail bed to create an ideal foundation for detailed artwork.
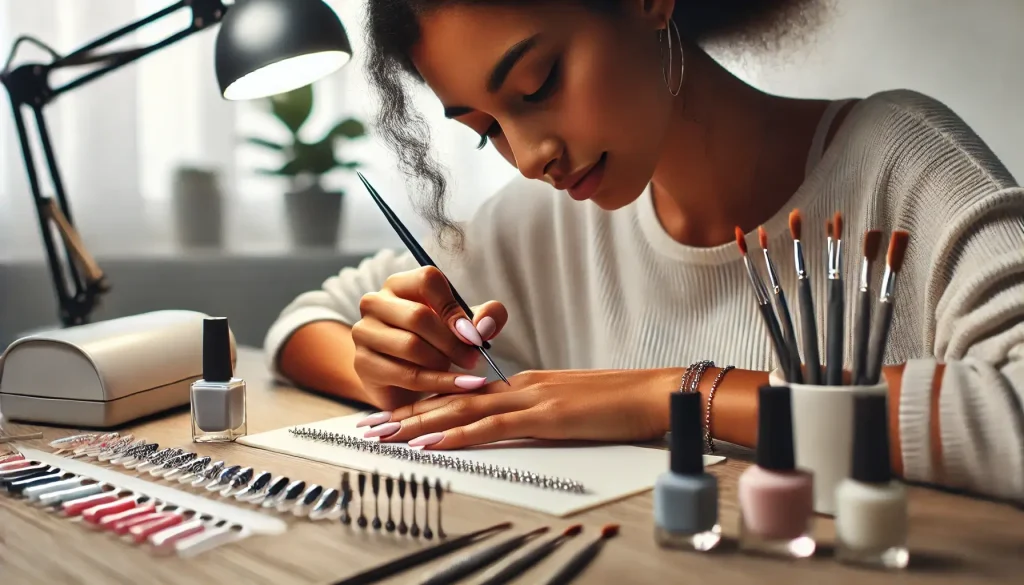
Essential Tools
To master Nail Art Techniques, having the right tools is paramount:
- Fine Brushes and Dotting Tools: Precision is key when drawing intricate patterns or tiny details.
- Striping Tape and Stencils: These tools help create clean, defined lines and geometric shapes.
- High-Quality Polishes: Invest in a range of colors with various finishes—matte, glossy, metallic—to add dimension and contrast.
- Top Coat: A durable top coat seals your design, enhances shine, and extends the life of your artwork.
Basic Nail Art Techniques
Building on the fundamentals, these basic techniques serve as the stepping stones for more complex designs:
1. Dotting and Freehand Painting
- Dotting Tools: Learn to use dotting tools to create patterns like polka dots, tiny hearts, or abstract clusters. Practice varying the pressure to produce different dot sizes.
- Freehand Detailing: With a fine brush, practice drawing simple lines, swirls, or small motifs. The key is to maintain a steady hand and start with light strokes that you can build upon.
2. Stripes and Geometric Patterns
- Striping Tape: Apply striping tape to outline geometric shapes. Once the tape is applied, fill in the spaces with contrasting polish for a crisp look.
- Layering Shapes: Experiment with overlapping tape to create triangles, chevrons, and other shapes that add visual interest and complexity.
3. Negative Space Art
- Leaving It Bare: Use negative space to your advantage by allowing portions of your natural nail to show through. This technique can create elegant, modern designs by balancing color and clarity.
- Accents and Borders: Frame your design with bold lines or accent colors while keeping the center area free. This contrast emphasizes the intricacy of the details.
Advanced Nail Art Techniques for Intricate Details
Once you’re comfortable with the basics, it’s time to explore advanced Nail Art Techniques that focus on intricate detailing.
1. Water Marbleing
Water marbleing is a technique that produces a unique, swirling pattern on every nail.
- Step-by-Step Process:
- Prepare a Container: Fill a shallow container with water at room temperature.
- Drop Colors: Place drops of different colored polishes onto the water’s surface.
- Swirl with a Toothpick: Gently swirl the colors using a toothpick or fine brush to create a marbled pattern.
- Dip Your Nail: Carefully dip your nail into the design, ensuring even coverage.
- Dry and Seal: Allow the polish to set, then finish with a top coat to lock in the pattern.
2. 3D Nail Art
3D nail art adds texture and dimension to your designs by incorporating raised elements.
- Techniques:
- Rhinestones and Studs: Apply small rhinestones or studs in patterns to create a tactile design. Use nail glue for secure placement.
- Textured Gels: Use gel polishes to build raised patterns, such as floral motifs or abstract designs. Layering and curing under a UV lamp can create a sculptural effect.
3. Stamping Techniques
Nail stamping allows you to transfer intricate designs quickly and accurately.
- How It Works:
- Stamping Plate: Choose a stamping plate with designs that appeal to you.
- Apply Polish: Use a scraper or sponge to pick up the polish from the plate.
- Stamping: Press the stamping plate onto your nail with even pressure.
- Seal the Design: Once the design is transferred, apply a top coat for durability.
- Tip: Practice with different angles and pressures to master the consistency of the transfer.
4. Fine Line and Detailing Brushwork
For ultra-fine details, using a high-quality, thin-tipped brush is essential.
- Intricate Patterns: Draw detailed lace, filigree, or abstract lines with precision.
- Layering Colors: Combine multiple colors in fine strokes to create gradients or intricate mosaic effects.
- Steady Hand: Practice on a smooth surface before applying directly to your nail to build confidence and control.
Creative Combinations: Mixing Techniques for Unique Designs
The true artistry of Nail Art Techniques lies in your ability to combine different methods to create one-of-a-kind designs.
- Hybrid Designs: Merge geometric patterns with freehand brushwork to produce layered effects. For example, create a striped background and overlay with delicate dots or floral accents.
- Contrast and Texture: Experiment with contrasting finishes—pairing matte with glossy, or smooth with textured—to enhance the visual impact of your nail art.
- Personalized Themes: Draw inspiration from your surroundings, hobbies, or current trends to create thematic designs. This personal touch makes your nail art uniquely yours.
Step-by-Step Tutorial: Mastering an Intricate Nail Art Design
Here’s a detailed tutorial to help you master a complex design using multiple Nail Art Techniques:
Tutorial: Geometric Floral Fusion
Step 1: Nail Preparation
- Remove any previous polish, shape your nails, and apply a base coat. Allow the base coat to dry thoroughly.
Step 2: Base Color Application
- Apply two coats of a neutral or pastel polish as the foundation. Let each coat dry completely.
Step 3: Creating Geometric Patterns
- Using striping tape, outline geometric shapes (triangles or chevrons) on one or two accent nails.
- Fill in the shapes with a contrasting color. Remove the tape carefully to reveal crisp, clean lines.
Step 4: Adding Floral Accents
- With a fine brush and a bright color, paint small floral motifs inside or around the geometric shapes.
- Use dotting tools to add tiny details, such as the center of a flower or delicate leaves.
Step 5: Final Touches
- Apply a layer of clear top coat over the entire nail to seal your design. Allow the top coat to cure fully to ensure durability.
Tips for Refining Your Nail Art Techniques
- Practice Regularly: Like any art form, consistency and practice are key. Set aside time to experiment with new techniques.
- Learn from Tutorials: Online videos and nail art blogs offer a wealth of tutorials. Observing experts can provide valuable insights and shortcuts.
- Invest in Quality Tools: High-quality brushes and tools not only enhance precision but also improve the overall finish of your designs.
- Take Your Time: Intricate designs require patience. Work slowly and deliberately to ensure each detail is executed perfectly.
Troubleshooting Common Challenges
Even the most skilled nail artists encounter challenges. Here are solutions to common issues in Nail Art Techniques:
- Uneven Lines: If your lines aren’t as crisp as you’d like, practice steadying your hand on a flat surface. Consider using a guide or stencil for consistent shapes.
- Smudging or Smearing: Ensure each layer dries completely before adding the next. Use quick-dry top coats to minimize smudges.
- Tool Control: If you’re struggling with fine brush control, practice on paper or a nail art practice sheet before applying designs directly to your nails.
Embracing the Creative Journey
Mastering Nail Art Techniques is an ongoing journey of creativity and skill development. Each design you create adds to your experience, enabling you to push the boundaries of what’s possible on such a small canvas. The more you experiment, the more unique and intricate your designs will become.
Join the Community
Engage with fellow nail art enthusiasts by sharing your designs on social media and joining online nail art communities. Feedback, inspiration, and collaboration are invaluable as you refine your skills and develop your personal style.
Conclusion
Intricate nail art is within reach when you master the right Nail Art Techniques. By building a strong foundation, investing in quality tools, and consistently practicing advanced methods, you can create stunning designs that reflect your creativity and precision. Whether you’re crafting minimalist patterns or complex, multi-layered artworks, each step enhances your artistic journey and elevates your nail art to new heights.
For more expert tips, detailed tutorials, and creative inspiration, visit our website at eu.artereciclada.com.br.
