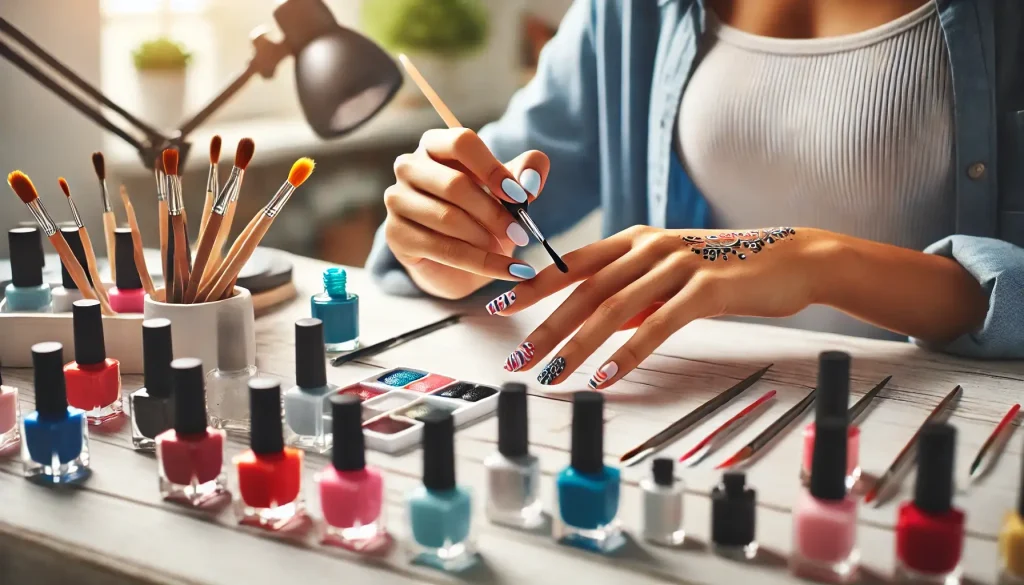
Nail art has transformed into a vibrant form of self-expression, allowing you to showcase your personality through creative designs. In this guide on Nail Art Designs, we provide you with practical tips, essential techniques, and expert advice to help you create stunning patterns effortlessly. Whether you’re a beginner or an experienced nail artist, our insights will inspire you to elevate your nail art game and achieve salon-quality results at home.
Índice
The Evolution of Nail Art Designs
Over the years, Nail Art Designs have evolved from simple painted nails to intricate works of art. Today, innovative techniques and a wide range of tools allow you to experiment with textures, colors, and patterns. This evolution has turned nail art into a popular trend and a creative outlet that blends fashion with personal style.
Why Nail Art Designs Matter
- Self-Expression: Your nails can become a canvas for creativity, allowing you to express your personality and style.
- Fashion Statement: Stunning nail art enhances your overall look and complements your outfit, making it an essential accessory.
- Therapeutic Outlet: The creative process of designing your nails can be both relaxing and fulfilling.
Essential Tools for Nail Art Designs
Creating beautiful Nail Art Designs starts with having the right tools. Here are some essentials every nail artist should consider:
- Pinceles para uñas y herramientas de punteado: For detailed designs, fine brushes and dotting tools allow precision in creating intricate patterns.
- Cinta de rayas y plantillas: These accessories help achieve clean, sharp lines and geometric shapes.
- Pulimentos de alta calidad: Invest in a variety of colors and finishes, from matte to metallic, to add depth and contrast to your designs.
- Capa superior: A durable top coat is essential for sealing your artwork and ensuring long-lasting shine and protection.
Popular Nail Art Techniques
There is a wide array of techniques you can explore to create eye-catching Nail Art Designs. Here are some popular methods to consider:
1. Minimalist Elegance
Minimalist designs focus on simplicity and clean lines. They are perfect for those who prefer a subtle yet sophisticated look.
- Uñas de acento: Use a neutral base on most nails and add a bold design to one or two accent nails.
- Negative Space: Leave parts of the nail unpolished to create a modern, chic appearance.
- Formas geométricas: Use striping tape to create triangles, stripes, or dots that add a minimalist flair.
2. Floral and Botanical Patterns
Floral designs remain a timeless choice. They bring a touch of nature to your Nail Art Designs.
- Hand-Painted Flowers: With a fine brush, create delicate blooms and vines on your nails.
- Stamping Kits: Use pre-designed floral stamps to achieve intricate patterns quickly and consistently.
- Ombre Backgrounds: Combine soft gradients with floral details for a layered, artistic look.
3. Abstract and Artistic Creations
For those who love to experiment, abstract designs allow you to play with colors and shapes without strict rules.
- Freehand Art: Let your creativity flow by painting swirls, splatters, or brush strokes that form unique patterns.
- Marbling Effects: Blend multiple colors using a toothpick or thin brush to create mesmerizing marbled effects.
- Metallic Accents: Incorporate metallic polishes or foils to add a glamorous touch to your abstract art.
4. Seasonal and Festive Themes
Tailor your Nail Art Designs to reflect seasonal moods or special occasions.
- Winter Wonders: Embrace cool tones, glitters, and snowflake motifs for a frosty winter look.
- Spring Blossoms: Use pastel shades and floral accents to evoke the freshness of spring.
- Holiday Themes: Design nails with symbols like hearts, pumpkins, or festive patterns to celebrate holidays and special events.
Step-by-Step Guide to Creating Your Nail Art Designs
For beginners eager to dive into nail art, a step-by-step approach can simplify the creative process. Here’s a basic tutorial to help you create a chic, minimalist design:
Paso 1: Preparación de las uñas
- Limpio y en forma: Remove old polish, trim, and shape your nails. Apply a base coat to protect your nails and create a smooth canvas.
- Hidratar: Use cuticle oil to hydrate and prepare your nail beds for design.
Paso 2: Aplicar el color base
- Choose a Base: Select a neutral or pastel polish as your base. Apply two thin coats, allowing each layer to dry completely.
- Let It Set: Ensure the base color is fully dried before moving on to the design stage.
Step 3: Create the Design
- Accent Application: Use a contrasting polish to create simple geometric patterns or accent lines. For precision, apply striping tape or use dotting tools.
- Add Details: Enhance your design with small dots, lines, or shapes. Experiment with different patterns to find what best expresses your style.
Paso 4: Sellar y proteger
- Capa superior: Finish with a top coat to seal your design, add a glossy shine, and prolong the life of your Nail Art Designs.
- Touch-Ups: Keep a small bottle of your accent polish handy for quick touch-ups as needed.
Tips for Maintaining Stunning Nail Art Designs
To ensure your nail art lasts as long as possible, consider these maintenance tips:
- Evite los productos químicos agresivos: When doing household chores, wear gloves to protect your nails.
- Regular Moisturizing: Use hand cream and cuticle oil frequently to keep your nails and skin hydrated.
- Proper Removal: Use non-acetone nail polish remover to minimize damage when removing your designs.
- Scheduled Touch-Ups: Refresh your nail art periodically to maintain a clean and polished look.
Advanced Techniques for Nail Art Enthusiasts
Once you’ve mastered the basics, you can experiment with more advanced techniques to push your Nail Art Designs to the next level.
Nail Art 3D
- Textured Elements: Incorporate rhinestones, studs, or small decals to add dimension and texture to your designs.
- Layering: Combine matte and glossy finishes for a multidimensional effect that captivates attention.
Water Marble Techniques
- Marbling Process: Drop different colors of polish into a container of water and swirl with a toothpick. Dip your nail to transfer the design and let it dry for a unique, one-of-a-kind pattern.
- Experimentation: Each dip creates a new pattern, offering endless possibilities for creative expression.
Gradient and Ombre Effects
- Sponge Technique: Use a makeup sponge to blend two or more colors seamlessly on your nails.
- Bold Contrasts: Experiment with contrasting colors to create striking gradients that add depth and visual interest.
Inspiration and Trends in Nail Art Designs
Staying inspired is key to evolving your nail art skills. Here are some trends currently shaping the world of Nail Art Designs:
- Abstract Geometry: Bold lines, asymmetric shapes, and unconventional color combinations for a modern look.
- Nature-Inspired Patterns: Designs that incorporate elements like leaves, watercolors, and organic shapes for a fresh, earthy feel.
- Minimalist Styles: Clean, understated designs that focus on simplicity and elegance.
- Mezcla y combina: Experiment with different designs on each nail for a playful, eclectic style that makes a bold statement.
Join the Community and Share Your Art
Engage with fellow nail art enthusiasts by sharing your Nail Art Designs on social media and joining online communities. Platforms like Instagram and Pinterest are excellent for finding inspiration, learning new techniques, and getting feedback from other creative minds.
Conclusión
Creating stunning Nail Art Designs is a journey of creativity, experimentation, and self-expression. With the right tools, techniques, and a little practice, you can transform your nails into a beautiful canvas that reflects your unique style. Embrace the art of nail design, stay inspired by the latest trends, and most importantly, have fun while exploring endless possibilities.
For more expert tips and creative inspiration, visit our website at eu.artereciclada.com.br.
